Gorgeous DIY Pink Birthday Nails You’ll Love
Want pretty pink birthday nails without paying for a salon manicure? You can create a festive look at home with regular nail polish, a few basic tools, and a little patience. You do not need long acrylic extensions or advanced nail-art skills to get started.
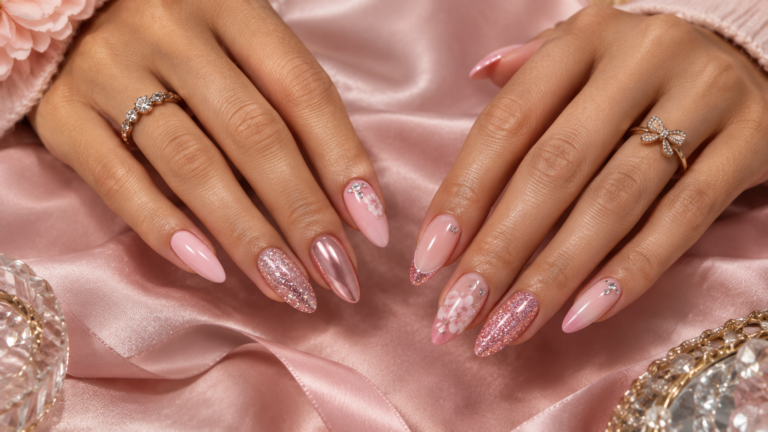
This beginner-friendly guide shows you how to create four DIY pink birthday nail designs: glossy baby pink nails, pink French tips, glitter-gradient nails, and tiny heart accents. Each tutorial includes the supplies you need, step-by-step instructions, and practical fixes for common mistakes.
Best for: Beginners, short natural nails, and anyone looking for affordable pink birthday nail art.
Estimated time: Around 30–60 minutes for a simple design, plus additional drying time if needed. Actual time depends on your polish, the number of coats, and your experience.
What You Need for DIY Pink Birthday Nails
You can create all four designs using ordinary nail polish. Start with the basics rather than buying a large nail-art kit.
| Tool or product | What it does |
|---|---|
| Nail file | Shapes and smooths nail edges |
| Nail polish remover and cotton pads | Removes old polish and cleans small mistakes |
| Base coat | Helps create a suitable base for color |
| Light pink polish | Creates a baby-pink or blush background |
| Hot pink polish | Adds French tips and decorative details |
| Clear top coat | Adds shine and helps protect the finished manicure |
| Fine glitter polish | Creates a sparkly birthday finish |
| Dotting tool or clean bobby-pin tip | Makes small dots and hearts |
| Small cleanup brush | Helps correct polish around the nail edges |
Budget-friendly tip: You do not need a professional dotting tool for simple nail art. A clean bobby-pin tip can make dots, while a fine brush can help create small hearts. Use tools gently and keep them clean.
Before You Start: Prepare Your Nails
Good preparation makes simple nail art look neater. Before choosing your design, follow these steps.
- Remove old polish. Start with clean nails so the new color goes on evenly.
- Shape your nails. File them into a rounded, oval, or squoval shape. Short nails are perfectly suitable for these designs.
- Clean and dry your hands. Remove dust and let the nail surfaces dry before applying polish.
- Protect the surrounding skin. Avoid cutting your cuticles or aggressively pushing them back.
- Apply a base coat. Follow the product instructions and allow it to dry as directed.
Work in thin layers rather than applying one thick coat. Thick layers can remain soft underneath even when the surface feels dry.
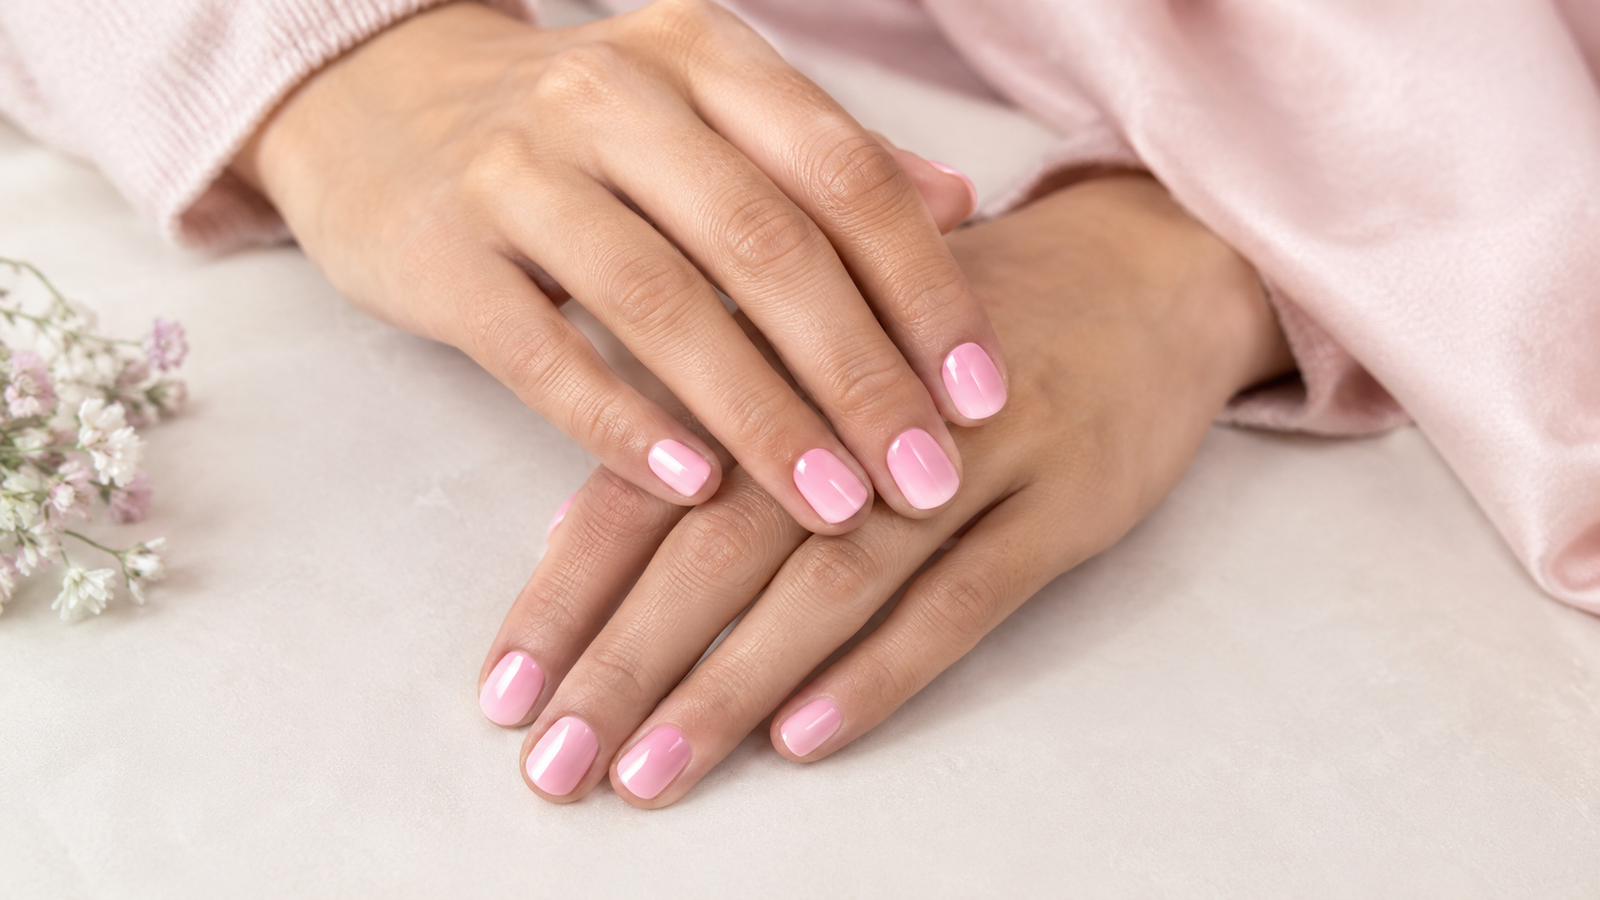
Tutorial 1: Simple Glossy Baby Pink Birthday Nails
Difficulty: Very easy
Best for: Beginners, short nails, minimalist outfits, and a clean birthday look.
This is the easiest design to try if you are new to doing your own manicure. The entire look depends on neat application and a smooth, glossy finish rather than complicated nail art.
What you need
- A pink base coat or regular base coat
- Baby-pink nail polish
- Clear top coat
- Nail polish remover for small corrections
Step-by-step instructions
Step 1: Apply your base coat.
Apply a thin, even layer over each nail. Let it dry according to the product instructions.
Step 2: Apply the first pink coat.
Start with a small amount of baby-pink polish. Place the brush near the center of the nail, then guide it toward the tip. Use gentle strokes to cover the sides without flooding the surrounding skin.
Step 3: Add a second coat if needed.
Once the first coat has dried sufficiently, apply another thin layer to make the color more even. Some sheer polishes may need additional coverage, while more opaque shades may not.
Step 4: Correct the edges.
If polish touches the skin, remove the excess carefully with a small brush and polish remover. Do not dig into the cuticle area.
Step 5: Finish with top coat.
Apply a compatible clear top coat after the color has dried enough for the next layer. Seal the free edge lightly if the product instructions allow it.
How to make this design look better
Choose a pink shade that matches your preferred style. Pale baby pink gives a soft finish, while a stronger rose pink looks more noticeable. On short nails, clean edges and an even surface matter more than nail length.
Common mistake: Applying too much polish to the brush. This creates thick layers, uneven coverage, and a longer drying time. Wipe excess polish from one side of the brush before painting.
Tutorial 2: DIY Pink French Tip Birthday Nails
Difficulty: Easy to moderate
Best for: A polished, elegant manicure with a little more detail.
Pink French tips look special without requiring decorations on every nail. You can use a pale pink base with hot-pink tips for contrast, or choose two softer pink shades for a subtle look.
What you need
- Base coat
- Sheer pink or nude-pink polish
- Hot-pink polish
- Clear top coat
- A thin nail-art brush, or nail guides if you have them
Step-by-step instructions
Step 1: Apply the base color.
Apply one or two thin coats of sheer pink polish. Let each coat dry as directed before adding the tips.
Step 2: Choose your tip method.
For a freehand design, use a fine nail-art brush to draw a thin curved line along the nail tip, then fill in the area above it.
If you find freehand painting difficult, nail guides can help create a more even boundary. Make sure the base polish is fully dry before applying adhesive guides, and follow the guide manufacturer’s instructions.
Step 3: Paint the pink tips.
Use a small amount of hot-pink polish. Work slowly and keep the tip thickness consistent across your nails. For short nails, a narrow line often looks more balanced than a thick French tip.
Step 4: Let the design dry.
Wait until the colored tips are dry enough for the next step. If you used guides, follow their instructions for removal so you do not pull up the polish.
Step 5: Apply top coat.
Use a compatible clear top coat to give the manicure a smooth finish.
How to fix uneven French tips
If one tip looks thicker than the others, do not keep adding polish to every nail. Let the design dry, then make a small correction with the pink base shade or a fine brush.
Common mistake: Removing nail guides while the polish is too wet, or applying them over tacky base color. Both can disturb the finish.
Tutorial 3: Pink Glitter-Gradient Birthday Nails
Difficulty: Easy
Best for: Birthday dinners, parties, and anyone who wants sparkle without covering every nail in glitter.
A glitter gradient concentrates the sparkle near the tips or cuticles, leaving part of the pink base visible. It creates a party-ready manicure without requiring elaborate nail art.
What you need
- Base coat
- Blush-pink or baby-pink polish
- Fine pink or silver glitter polish
- Clear top coat
- A small brush for cleanup
Step-by-step instructions
Step 1: Paint the pink base.
Apply your pink polish in thin coats until the color looks even. Allow it to dry according to the product directions.
Step 2: Choose where the glitter will go.
For a classic gradient, place the glitter near the tips. For a different look, concentrate it near the cuticles while keeping the skin clear.
Step 3: Apply a light layer of glitter.
Start at your chosen area and spread the glitter toward the middle of the nail. Use less product as you move away from the main glitter area. This creates a softer transition.
Step 4: Build the sparkle gradually.
Let the first layer dry, then add a little more glitter where you want the strongest shine. Avoid creating a thick pile of glitter polish at the nail edge.
Step 5: Finish with top coat.
Once the design has dried sufficiently, apply a compatible top coat to smooth the surface and add shine.
How to choose the right glitter
- Fine pink glitter: Creates a soft, coordinated look.
- Silver glitter: Adds a cool-toned sparkle against baby pink.
- Champagne glitter: Gives a warmer, understated finish.
Common mistake: Applying dense glitter across the whole nail when you want a gradient. Start with less polish and build the effect gradually; adding more is easier than correcting a thick layer.
Tutorial 4: Cute Pink Birthday Nails With Tiny Hearts
Difficulty: Easy to moderate
Best for: Cute nail art, short nails, and a playful birthday manicure.
Tiny hearts can make a basic pink manicure feel personalized. You do not need to draw a heart on every nail; one or two accent nails can be enough.
What you need
- Base coat
- Light pink polish
- Dark pink or cherry-pink polish
- A clean dotting tool or bobby-pin tip
- Clear top coat
Step-by-step instructions
Step 1: Apply the pink base.
Paint your nails with light pink polish. Allow the color to dry sufficiently before adding the heart details.
Step 2: Choose your accent nails.
Start with one or two nails, such as the ring fingers. This gives you room to practice without making the whole manicure complicated.
Step 3: Make two small dots.
Using a dotting tool or clean bobby-pin tip, place two small dots of darker pink polish close together.
Step 4: Connect the dots into a heart.
Use a fine brush or the tip of a clean nail-art tool to draw the dots downward into a small point. Work gently while the polish is still workable, without scraping the base color.
Step 5: Let the hearts dry.
Give the details enough time to dry before adding top coat. If the heart smears when touched lightly with the brush, wait longer.
Step 6: Seal the design.
Apply a compatible clear top coat gently so the brush does not drag the heart design across the nail.
How to make tiny hearts look neat
Keep the hearts small and use a contrasting shade so their shape remains visible. On short nails, one small heart is often more effective than several large motifs.
Common mistake: Using too much polish for each dot. Large dots can merge into a blob. Practice on paper first and use a small amount of polish on your tool.
Which DIY Pink Birthday Nail Design Should You Choose?
Use this quick comparison to choose a design that matches your time, skill level, and preferred style.
| Your preference | Best design to try |
|---|---|
| You are a complete beginner | Glossy baby pink |
| You want an elegant manicure | Pink French tips |
| You love sparkle | Pink glitter gradient |
| You want cute nail art | Tiny pink hearts |
| You have short natural nails | Baby pink or small heart accents |
| You have very little time | One even pink color with a glossy top coat |
If you are unsure, start with the glossy pink manicure. You can add glitter or tiny hearts the next time you paint your nails.
How to Make Your DIY Birthday Manicure Last
A careful application and gentle nail care can help your manicure look neat for longer.
- Apply polish in thin layers and allow each layer to dry according to the instructions.
- Use a compatible base coat and top coat.
- Avoid picking or peeling off polish when it begins to chip.
- Wear gloves when doing prolonged household cleaning.
- Moisturize your hands and nails after polish removal.
For additional guidance, read the American Academy of Dermatology’s manicure and pedicure safety advice. Dermatologists advise against cutting or forcefully pushing back cuticles because this can increase the risk of infection.
If you use gel polish instead of regular polish, follow the product’s curing and removal instructions. Gel products require specific curing equipment, and they are not interchangeable with ordinary nail polish.
DIY Pink Birthday Nails: Common Mistakes to Avoid
Painting thick coats: Thick layers can take longer to dry and may smudge. Apply several thin coats when necessary.
Starting nail art too early: If the base color is still wet, dots, hearts, and French tips can drag or bleed. Allow the base to dry sufficiently first.
Using too many decorations: Glitter, hearts, gems, and multiple colors can compete for attention. Choose one main detail for a cleaner look.
Ignoring cleanup: Polish on the surrounding skin can make an otherwise neat manicure look messy. Correct small mistakes carefully before the polish fully sets, without irritating the skin.
Trying a complicated design for the first time right before the party: If your birthday is today, choose glossy pink or a simple glitter accent. Save more detailed nail art for when you have time to practice.
Frequently Asked Questions
Can I do pink birthday nails without acrylics?
Yes. All four designs in this guide can be created on natural nails with regular nail polish. Extensions are not necessary for a festive manicure.
What is the easiest DIY pink birthday nail design?
A glossy baby-pink manicure is the simplest option because it requires only basic polish application. If you want a small decorative detail, add one or two tiny hearts after the base color dries.
How do I make pink French tips at home?
Apply a sheer pink base, let it dry, then paint a narrow pink line along each nail tip using a fine brush or suitable nail guides. Finish with a compatible top coat after the design has dried.
Can I create DIY pink birthday nails on short nails?
Absolutely. Glossy pink polish, narrow French tips, glitter gradients, and tiny heart accents all work on short nails. Keep decorative details small so the design remains easy to see.
How long does a DIY manicure take?
A basic manicure may take around 30–60 minutes to apply, but detailed designs and drying time can add more. Follow the polish instructions rather than relying only on how dry the surface feels.
How can I fix a smudged nail?
If the polish is still wet, avoid touching it repeatedly. Depending on the damage, you may be able to smooth the affected area gently or remove the polish from that nail and start again. Let the corrected layers dry before continuing.
Final Thoughts
DIY pink birthday nails do not need to be complicated to look beautiful. Start with glossy baby pink if you are new to nail art, or try French tips, a glitter gradient, or tiny hearts when you feel ready for a little more detail.
The key is to work in thin layers, allow enough drying time, and choose a design that suits your skill level. With a few basic supplies, you can create a birthday manicure at home without needing acrylic extensions or an expensive nail-art kit.
Looking for more styles before choosing your manicure? Explore our guide to 36 pink birthday nail ideas that make every celebration special for inspiration, then return to this tutorial to recreate a simple look at home.